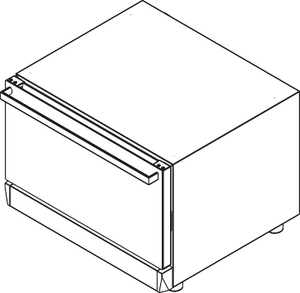
CS aerotherm Convection Oven BU-TO

Safety Warnings
Failure to comply with the following guide may cause damage and injury even fatal, forfeits the warranty and relieves the Manufacturer of any liability. Before installation, use and maintenance of the equipment, please read this booklet carefully and keep it carefully for any future consultation by the various operators. If you do not understand all the contents of this booklet, please contact the Manufacturer. In case of loss or deterioration of the documentation, request the Manufacturer to send the replacement one.
- Before use and maintenance of the equipment carefully read this booklet and keep it carefully for any further future consultation by the various operators. If some parts are not understandable, please contact the Builder.
- In case of transfer of the equipment, have the new user have this booklet.
- Use, cleaning and maintenance other than those indicated in this booklet are considered improper and may cause damage, injury or fatal accidents, render the warranty void and relieve the Builder of any liability.
- Cleaning and maintenance intended for the user must not be carried out by children without supervision.
- Children must be supervised to ensure that they do not play with the appliance.
- This appliance must only be used for the cooking of food in professional kitchens by qualified personnel: any other use does not conform to the intended use and therefore dangerous.
- It is recommended to monitor the equipment throughout its operation.
- The apparatus may be used by children aged 8 years or more and by persons with reduced physical, sensory or mental capacity, or without experience or knowledge, provided that they are supervised or after instructions concerning the safe use of the apparatus and the understanding of the hazards inherent in it. Children should not play with the brace. Cleaning and maintenance to be carried out by the user and shall not be carried out by children without surveillance.
- If the equipment does not work or you notice functional or structural anomalies, disconnect it from the power and water supply and contact a Service Center Authorised by the Builder without attempting to repair it yourself. For a possible repair request the use of original spare parts. Failure to comply with this requirement renders the Warranty void.
- It is recommended, to ensure that the appliance is in perfect conditions of use and safety, that it be subject to maintenance and control by an authorised service centre at least once a year.
- Do not block any air intake on the equipment. The user must only carry out routine cleaning operations. For inspection, extraordinary maintenance and replacement of defective components, please contact an Authorised Service Centre to send a specialised and adequately trained technician.
- Before carrying out any cleaning, it is necessary to disconnect the power supply of the appliance and wear appropriate personal protective equipment (e.g. gloves, etc.).
- If the appliance is fitted with wheels or is positioned above a piece of furniture with wheels, its freedom of movement must be limited by means of anti-movement devices (e.g. chains) so that during movement it cannot in any way damage the electrical cables, water and drain pipes.
Installation Instructions
- All installation and extraordinary maintenance operations must be carried out only by qualified personnel authorised by the Builder, in accordance with the regulations in force in the country of use and respecting the regulations relating to installations and safety at work.
- Before installing the equipment, check the compliance of the plants with the regulations in force in the country of use and with the information on the technical data plate.
- The equipment shall be disconnected from the power supply before any installation or maintenance is carried out.
- Interventions, tampering or changes not expressly authorised and that do not comply with the provisions of this manual will discontinue the warranty. Installation or maintenance other than those indicated in this booklet may cause injury or fatal accidents to the installer and the user and cause damage to the facilities of the installation site.
- Replacement of the power cord shall only be carried out by a qualified and authorised technician. The cable may only be replaced by one of similar characteristics: the technical data plate always indicates the type of cable to be used and its section. The grounding cable must always be green yellow.
Equipment Transport
Wearing personal protective equipment, bring the equipment into the installation room using a forklift truck. In the case of trolley ovens, insert the forks from the front side taking care not to damage the carriage lanes and the exhaust pipe located at the bottom of the furnace
Attention
Equipment must never be overturned, or upside down!
During the handling is forbidden the transit or the permanence of not employed persons near the working area. The packaging material, as potentially dangerous, must be kept out of reach of children or animals and properly disposed of in accordance with local regulations.
Placement

When choosing the positioning room, take into account that the equipment must be easily movable for any extraordinary maintenance: pay attention that any masonry works after installation (e.g. building walls, replacing doors with narrower ones, renovations, etc...) does not hinder movement.
The positioning room shall:
- Be well ventilated and not exposed to atmospheric agents.
- Have a temperature between +5 and +45 ºF (+41 ºF and +113 ºF) and humidity below 70%.
- Have a floor without roughness, perfectly leveled and supporting the equipment at full load.
Venix Ovens User manual - To comply with the current regulations in terms of safety at work and on plants.
- Be dedicated to the preparation of food.

It is recommended to install the equipment:
- Under a fume hood of adequate power (read the section on fume exhaust carefully);
- So that you have access to the connections;
- So that the equipment door can be fully opened.
IT IS NOT RECOMMENDED TO PLACE NEAR OTHER EQUIPMENT THAT REACHES HIGH TEMPERATURES.
In case there is a need to provide a space of at least 50 cm side and 70cm back from these or interpose an insulating wall.

FOR SAFETY REASONS, DO NOT PLACE THE HIGHEST PAN AT A HEIGHT OF MORE THAN 160 CM.
If this is necessary, the “burn hazard” adhesive provided with the equipment must be applied at the indicated height.
DO NOT PLACE THE EQUIPMENT IN THE VICINITY OF FLAMMABLE AND/OR POTENTIALLY EXPLOSIVE MATERIALS OR CONTAINERS (E.G. PARTITIONS, GAS CYLINDERS, ETC.) DUE TO FIRE HAZARDS.
Cover any walls with non-flammable thermal material.
THE EQUIPMENT IS NOT SUITABLE FOR RECESSED INSTALLATION. DIRECT GROUND SUPPORT OF THE EQUIPMENT IS NOT ALLOWED.
Supports are available from the Manufacturer and/or Retailer to be placed under it to obtain the desired height from the ground. Do not install equipment without pins. The equipment can be positioned:
- Above a table or a cabinet made of non-flammable material;
- On top of a compatible leavening agent;
- On top of a compatible furnace or a compatible blast chiller;
- Above a structure of the Builder (stand).
Support Over a Table / Wardrobe
If the equipment is positioned above a work table or a neutral cabinet, the latter must be perfectly level and stable, must support the equipment at full load, and the support surface must be fireproof and resistant to high temperatures. If necessary, act on the feet of the equipment to adjust the setting.
Support on top of a Leavening Device
If the equipment is placed on top of a leavening device of the same series, it is sufficient to place it on top of the latter, making sure that the feet are stable and fit into the pins of the lower structure.
Support over an Oven or Blast Chiller Temperature
If the equipment is positioned above furnaces or blast chillers of the same series, it is mandatory to mount the overlap kit to be requested from the manufacturer, then insert the base of the oven feet into the pins of the lower equipment. For the assembly instructions of the overlay kit refer to the sheet contained in the packaging of the same.

Support on a Stand
If the equipment is positioned above a stand, insert the base of its feet into the pins of the lower structure. You can always complete your composition, adding or replacing accessories and complementary equipment, in this way you can meet every need for cooking or space. Visit our website or contact us for any further information.
Electrical Connections
Attention: Before proceeding with the electrical connection, read carefully the safety warnings in the first pages of this manual and always compare the system data with those shown in the technical data plate.
The connection to the power supply must comply with the regulations in force in the country of installation of the equipment and must be carried out by qualified personnel and authorized by the manufacturer. Failure to comply with these rules may cause damage and injury, forfeits the warranty and relieves the Manufacturer of any liability.
When the appliance is in operation, the value of the supply voltage must not differ by +/- 10% of the value reported in the technical data.
The illustrated connection and the colors of the cables are indicative, please refer ONLY to the diagram shown on the equipment.
For the direct connection to the power supply, it is necessary to interpolate between the equipment and the network itself, a device, sized according to the load, which ensures disconnection and whose contacts have an opening distance allowing complete disconnection under the conditions of voltage category III. Proper ground connection is required and the ground cable shall not be interrupted in any way case.
When several devices are present in the same room, it is mandatory to provide a equipotential connection using the appropriate clamp marked by the symbol located in the lower back of the device. This clamp allows you to connect a ground cable according to current legal requirements. On the equipment there is a sticker indicating how to connect to the terminal block according to the type of voltage available.

How to make the Connections
- Open the back of the equipment and locate the terminal block.
- Loosen the grommet and insert the power cord through it. The label on the side always indicates the type of cable to be used and its section, they depend on the voltage and the absorption of the equipment (e.g. Cable: 5x10 mm2 H07RNF).
- Connect the wires of the cable following the diagram on the external adhesive label: make ONLY the indicated connections without changing them. The yellow/green ground conductor shall be at least 3 cm longer than the other conductors.
- PE (yellow/green): ground protection conductor
- N (blue): neutral conductor
- L1/2/3 (brown/grey/black): phase conductors
- A wrong connection could cause overheating of the terminal block leading to melting and risk of electric shock.
- Check the absence of electrical dispersion between phases and earth. Verify the electrical continuity between the external carcass and the ground wire of the network. It is advisable to use a multimeter to carry out these operations.
- Close the side with screws and lock the cable by screwing in the grommet nut.
Replacement of the Power Cord
This operation must be carried out only by a qualified and authorized technician. The cable can only be replaced with one of similar features: the technical data plate always indicates the type of cable to be used and its section. The grounding cable must always be yellow green.

Water Connection
Incoming Water
The equipment is provided with a main water inlet for humidification with a 3/4” connection. For connection use only the supplied material, do not use or reuse other pipes. Before connecting the hose to the appliance, drain water to remove any impurities in the water pipe. Provide a gate valve for closing the water supply when needed. To properly perform the water connection, always comply with the regulations in force.
Features of Incoming Water
The inlet water shall have the following characteristics:
- Maximum temperature of 30 ºC (86 ºF).
- Maximum hardness of 5 ºF (French grades) to avoid build-up limestone inside the cooking chamber.
- Be potable.
- Pressure values between 150 kPa (1.5 bar) and 200 kPa (2 bars).
Pressure below 150 kPa (1.5 bar): The equipment may not function properly.
Pressure greater than 200 kPa (2 bar): Install a reducer pressure set at 200 kPa (2 bar).
The hardness of the water indicates the content of magnesium ions, calcium and heavy metals present in the water. It is measured using commercially available kits. The hardness is expressed in French degrees (somebody f ) or German (someone dh) (1 person dh person German degrees = 1.8 person French degrees - 1 person f = 10 mg of calcium carbonate (person 3) per litre of water).
Classification of Water
The inlet water shall have the following characteristics:
- Very sweet up to 7 flat f
- Sweets from 7 to 14
- Averagely hard from 14 to 22
- Fairly hard from 22’ f to 32’ f
- Hards from 32 to 54
- Very hard over 54
In the case of excessively hard water (> 5 someone F) use demineralizers (available from the Manufacturer/Dealer); an excessive hardness of the water could cause limescale to accumulate inside the cooking chamber and damage the internal pipes, heating elements, fans, solenoid valves.
Discharge of Fumes
During cooking, hot fumes and smells are produced that are evacuated through the fumes exhaust chimney located at the rear/top of the appliance (the temperature and humidity of the fumes depend on the cooking parameters set on the oven and the type and quantity of food placed in
the oven). The fumes escaping from the chimney can be extracted outside the room where the oven is installed or they can be condensed using the optionally available condensation hood (the manufacturer recommends installing its own hoods). Make sure that there are no objects and/or materials above the flue outlet that could obstruct the flow of fumes or be damaged by the temperature or the fumes themselves.
Safety Rules for the User
Warnings for the First Ignition
The use of its equipment is simple and intuitive. In the following pages we will guide you step by step in the knowledge of the equipment: this will give you the certainty of getting results that always meet your expectations and will ensure optimal performance and long life of your equipment.
- At the first use of the equipment, thoroughly clean the interior of the room by carrying out a wash.
- Before use, make sure that there are no non-compliant objects (instruction booklets, plastic bags or anything else) inside the equipment chamber.
- Make sure that the exhaust fumes are free from obstructions and there are no flammable materials in its vicinity.

Film Removal
Remove all protective film from the equipment, avoiding the use of abrasive/aggressive substances or metal objects (e.g. scrapers). If adhesive residue remains, wipe with a soft cloth soaked in oily detergent, suitable for non-aggressive or abrasive stainless steel surfaces. Avoid using scrapers, abrasive tools or cutting edges.
Warnings for Cooking
- Be careful to open the door when the oven is hot.
- Avoid salting food in the cooking chamber. If not avoidable, clean the equipment as soon as possible.
- Avoid superimposing the food or overloading the trays (maximum 10 kg per pan).
- Distribute the pans evenly over the entire height of the cooking chamber, respecting the maximum number indicated for each appliance. Always follow the loading instructions of the equipment in your possession.
- In the case of cooking with grills of particularly fatty foods (for example, roasts or poultry), insert a baking tray with high edges on the bottom of the cooking chamber for the collection of fats from foods.
- For best results, avoid opening the door during cooking.
- To handle containers, accessories and other items inside the cooking chamber, always wear protective thermal clothing (PPE) suitable for the use in question (e.g. thermal gloves).
- During cooking and until cooling, the outer and inner parts of the equipment may be very hot (temperature greater than 60 ºC/ 140 ºF). To avoid the risk of burns, it is advisable not to touch the areas marked with this symbol.
- Be careful when extracting trays from the appliance chamber, especially if they contain liquids.
- Do not use highly flammable food or liquids during cooking (e.g. alcohol).
- Make sure that the tray holder structures inside the cooking chamber are well locked to the walls otherwise the trays containing hot food or liquids may fall out causing burns.
- Always keep the cooking chamber clean, carrying out a daily cleaning: fats or food residues if not removed from its interior could catch fire!
- Use the equipment with an ambient temperature between +5 and +45 ºC (+41 ºF and +113 ºF).
I/O Test
Access to the I/O test is only enabled to the authorised technical service via a dedicated password. Uninformed I/O test can lead to machine malfunction. Inside the dedicated screen, all relays and inputs used are indicated.
By pressing the keys as shown in the image below, the relative relays are activated:
- RL1 = Relay test reset gas block
- RL2 = Test relay solenoid valve washing
- RL3 = Cleansing pump relay test
- RL4 = Camera light relay test
- RL5 = test relay solenoidification valve
- RL6 = Test relays resistors
- RL7 = Test relay rotation fan direction clockwise
- RL8 = Test relay rotation fan direction anticlockwise
- RL9 = MIN/MAX fan speed relay test
- PR1 = Displaying room probe temperature
- PR2 = Temperature display probe heart
- BRD = Displaying temperature probe board
- DI4 = Test micro port relay
- DIHV = Safety thermostat relay test
Cleaning and Maintenance
General Warnings for Cleaning
- Before carrying out any cleaning operation, it is necessary to disconnect the power supply of the appliance and to wear appropriate personal protective equipment (e.g. gloves, etc...).
- The user shall only carry out routine cleaning operations. For inspection, maintenance and replacement of defective components contact an Authorized Service Center to send a specialized and properly trained technician.
- The Manufacturer does not recognize in the warranty damages resulting from maintenance failure or improper cleaning (e.g. use of unsuitable detergents).
- Before any cleaning, wait until the cooking chamber is cold (temperature not higher than 70 ºC).
For cleaning any part of the equipment or accessories DO NOT use:
- Abrasive or powdered detergents;
- Aggressive or corrosive detergents (e.g. hydrochloric/muriatic or sulphuric acid, caustic soda, etc...). Attention! Do not use such substances even to clean the sub-structure / the floor under the equipment;
- Abrasive or pointed tools (e.g. abrasive sponges, scrapers, steel brushes, etc...);
- Steam or pressure water jets.
Cleaning of the Door and Interior Glass
To clean the glass inside the door, wait until the oven has completely cooled. The inner crystal can be opened for easy cleaning. Use a soft cloth just moistened of a neutral product, specific for crystals, following the instructions of the manufacturer of the detergent.
Ordinary and Manual Cleaning of Cooking
At the end of a working day, it is necessary to clean the equipment, both for hygienic reasons and to avoid malfunctions.
The furnace must never be cleaned with direct or high pressure water jets. Similarly, iron cleaning pads, brushes or common steel scrapers should not be used to clean the appliance.
Attention
Any grease and food residues in the cooking chamber may catch fire while using the oven, so it is advisable to remove them promptly.
- Wait for the cooking chamber to cool.
- Remove the side grids that hold the baking pans.
- Remove any residues that can be removed manually and put the removable parts in the dishwasher.
- Clean the cooking chamber with warm soapy water.
- Subsequently, all affected surfaces should be thoroughly rinsed, taking care not to leave any residue of detergent.
- To clean the outside of the oven, use a damp cloth and a mild detergent.
To properly perform manual cleaning, follow these steps:
- Turn on the appliance and set the temperature to 176 ºC F (80 ºC).
- Leave it on for 10 minutes (with steam function, for preset ovens).
- Turn off the appliance and let it cool.
- Remove the side tray holders.
- Spray the detergent all over the inside of the oven and wait 10 minutes.
- Rinse the cooking chamber thoroughly at the end of the cleaning cycle.
It is strictly forbidden to wash the cooking chamber at temperatures above 70 ºC (158 ºF). Danger of sunburn.
Cleaning of the External Surfaces
The daily cleaning of the furnace baking chamber coating must be carried out with a non-abrasive detergent to ensure its proper functioning.
Use plastic bristles or a sponge soaked in vinegar and hot water in case of dry residues.
Use only a damp cloth with hot water or products suitable for cleaning stainless steel. Do not use acid or ammonia products.
Attention: It is recommended never to clean the appliance with water jets or steam under pressure.

Fuse Replacement (2.4" Version) To replace the fuse, follow the following steps and directions in the image:
- Disconnect the oven from the mains and let it cool.
- Remove the back back
- The fuse holder will be located in the back of the furnace, near the transformer
- Remove the fuse holder cover, remove the fuse and replace it with a new one.
Warnings and Alarms
Camera Probe Failure
This alarm appears if the probe turns out:
- Shorted
- Interrupted
- Out of measurement range
This alarm is automatically reset, then, removing the cause of the fault, the alarm resets automatically. This alarm is a serious alarm that interrupts any cooking process in progress. The buzzer plays continuously, and can be switched off by pressing any key.
With the ON/OFF button you can exit the error screen, but if the alarm conditions are not resolved, the next attempt to perform a firing, the alarm screen reappears and the buzzer resumes to sound.
Safety Thermostat
This alarm appears if the maximum operating temperature of the equipment is exceeded. This is a manual reset alarm, the thermostat can be reset by pressing the red button on the same. Check that the cooling fan filters are clean and that the installation distances have been respected.
To reset the thermostat:
Remove the thermostat cap on the back of the oven. Open the door and wait for the oven to cool.
Press the red button to reset it.
Contact a specialist technician (Customer Service) if the problem persists.
Attention: If the alarm repeats several times, wait for technical intervention before proceeding to further manual reset to avoid damaging the equipment.
Lack of Tension
If there is a lack of tension, the machine proceeds with the verification of any cooking, proofing or washing cycles started before the block. The P207 manages the voltage block.
- In the case of cooking cycles or leavening if the blackout remains for less than 1 minute, when the voltage returns, the cycle resumes from where it was interrupted but an alarm is generated.
- If the value of 1 minute is exceeded, the cycle does not start automatically and an HACCP alarm is generated for critical time (in the HACCP log the alarm code 320 will be indicated to indicate recovery from power fail).
- In the case of washing cycles if the lock remains less than 1 minute, the cycle resumes from the break; for a time longer than 20 minutes, the cycle starts again from the beginning.
Preventive Maintenance
The furnace performs analyses on some relevant parameters to assess the status of the components and warn about the need to perform predictive maintenance of the equipment, in order to guarantee the customer the highest standard of performance and reliability. When certain thresholds are exceeded, a non-blocking warning will appear on the display to indicate the need to perform maintenance on the affected component.
The alert will appear:
- Each ignition of the oven, for the first week after the threshold has been exceeded;
- At each end of cooking, after the first week of exceeding the threshold. The warning can be hidden by pressing the ON/OFF button.
Predictive Maintenance Alert List:
- Limit number door openings
- Limit safety thermostat interventions
- Limit number water injections
- Limit number of washes
- Limit number of detergent loads
- Limit number of resistance interventions
- Engine operating hours limit
- Light-hour limit on
- Limit hours above 90 °C
- Limit of hours of cooling scooter technical compartment
- Limit of hours motor injection air
Upon the appearance of the notice, the customer is invited to contact the after-sales service to verify the status of the components and their maintenance or possible replacement.
Causes of Common Problems
If the appliance has a malfunction, disconnect it from the mains and turn off the water. Before calling customer service, check the table below.
| Problem | Cause | Resolution |
|---|---|---|
| At START the equipment does not start | Door is open | Check that the door is closed. |
| Door micro-switch stays open also with closed door | Contact a specialized technician for part check or replacement (after sales support)) | |
| The equipment does not cook evenly | Fans no longer reverse rotation direction | Contact a specialized technician for part check or replacement (after sales support) |
| One of the fans is not working | ||
| One of the heating elements is not working | ||
| Door gasket is not properly positioned | Correctly reposition the door seal to the appropriate location. | |
| The equipment is completely off | Lack of power supply | Restore supply voltage |
| Connection to power supply is not correct | Check the connection to the power line according to technical label. | |
| Safety thermostat triggered | Contact a specialized technician for part check or replacement (after sales support) | |
| Water is not coming out from humidification pipe | Water line is closed | Open water line. |
| Connection to power line is not correct | Check the connection to the water supply according to the equipment manual. | |
| Water inlet filter obstructed by impurities | Clean the filter mesh. | |
| With the door closed, water comes out of the frontal gasket | Gasket is dirty | Clean the gasket with a damp cloth. |
| Damaged gasket | Contact a specialized technician for part check or replacement (after sales support) | |
| Problem with door closing mechanism | ||
| Fan stops during operation | Motor safety thermostat triggered | Turn off the equipment and wait for the thermal protection of the engine to close automatically.
Check if installation comply with instructions in the manual. If this happens again, contact a specialized technician for part check or replacement (after sales support). |
| Motor capacitor failed | Contact a specialized technician for part check or replacement (after sales support). | |
| Error message digital ovens: ERR/Er1 | Camera probe malfunction | Contact a specialist repair technician (Customer Service). |
Annual Maintenance
For the annual maintenance of the appliance it is advisable to contact the dealer to send a specialised technician.
Periodic Activities to be Borne by the User
The table below shows general maintenance that can be performed periodically by the user. Failure to comply with these procedures may result in malfunction or failure of the appliance.
| Frequency of Operations | ||||
|---|---|---|---|---|
| Description | Daily | Weekly | Monthly | Annual |
| General visual inspection | X | |||
| Cleaning of the cooking chamber | X | |||
| Cleaning of water inlet filter | X | |||
| Check of softener operation | X | |||
| Cleaning of the electrical components | X | |||
| Check of the electrical clamps | X | |||
| General performance check | X | |||
| Cooling filter cleaning | X | |||
Period of Inactivity
During periods of inactivity, disconnect the electricity and water supply. Protect the outer steel parts of the equipment by passing them with a soft cloth just soaked in petroleum jelly oil. Leave the door ajar to ensure proper air exchange.
When reset, before use:
- Carry out a thorough cleaning of the equipment and accessories;
- Reconnect the equipment to the power supply, water;
- Check the equipment before re-use;
In order to ensure that the appliance is in perfect condition for use and safety, it is recommended that it is maintained and checked at least once a year by an authorised service centre.
Disposal and End of Life
To avoid any unauthorized use and the risks associated with it before disposing of the equipment:
- Make sure that it is no longer possible to use it: for this purpose, the power cord must be cut or removed (when the equipment is disconnected from the mains).
- Make sure that no child is accidentally trapped inside the cooking chamber for play, to this end block the opening of the door (for example with adhesive tape or fasteners).
Equipment Disposal
Pursuant to art. 13 of Legislative Decree no. 49 of 2014 “Implementation of the WEEE Directive 2012/19/EU on waste electrical and electronic equipment” The bar-barred box mark specifies that the product was placed on the market after 13 August 2005 and that at the end of its useful life it should not be treated as other waste but should be disposed of separately. All equipment is made of recyclable metal materials (stainless steel, iron, aluminum, galvanized sheet, copper, etc.) in a percentage greater than 90% by weight.
It is necessary to pay attention to the management of this product at the end of its life by reducing the negative impacts on the environment and improving the effectiveness of the use of resources, applying the principles of “polluter pays”, prevention, preparation for reuse, recycling and recovery. Please note that improper or improper disposal of the product involves the application of the penalties provided for by current legislation.
Information on Disposal (European Union Only)
The EU Directive on WEEE equipment has been transposed differently from each country, so if you want to dispose of this equipment we suggest that you contact the local authorities or the Reseller to ask for the correct method of disposal.
Types of Cooking
Attention: For a good cooking it is necessary to preheat the oven before each cooking. It is advisable to preheat with set a temperature at least 30 ºC higher than what will be the cooking temperature. Increase the temperature in case of full load.
Conventional Cooking
Food cooks thanks to the dry heat generated by the resistances. Fans allow a uniform diffusion of the hot air in the cooking chamber. If necessary, this type of cooking allows you to manually enter moisture in the room.
Steam Cooking
The food cooks thanks to the steam in the room. To ensure optimal results it is necessary that the humidity value is set to “100%”. For the humidification function to function satisfactorily, the temperature must be set at least 80- 100 ºC. Steaming is ideal for all those dishes that require “delicate” cooking or for pasteurisation of creams.

Combi Cooking
Food cooks thanks to the high temperature generated by the resistances associated with the steam automatically fed into the room.
Manual Cooking and Cooking with Recipe
In manual cooking, the user, based on his experience, sets the desired cooking parameters for one or more cooking steps:
Cooking Time
Temperature in the Room
Humidity Regulation
Fan Speed
The cooking time is set to time (e.g. 1:40 hours:minutes) it will end at the end of the latter (0.00);
In recipe cooking, previously stored recipes are used by the user. The equipment can hold up to 99 recipes.

Mechanical Control Panel
- Thermostat Warning Lamp
- Temperature Regulation
- Time Regulation
- Fan Speed Regulatioon
- Steam/Humidity Regulation
Time Regulation
When the manual option is selected, the oven is always on for an infinite time until the operator intervenes. When a certain value is selected, the oven remains on for that amount of time (maximum 120 minutes).
Temperature Regulation
This knob allows you to select the desired cooking temperature.
Thermostat Warning Lamp
When the oven heating elements light up, they are switched on because the internal temperature of the cooking chamber is lower than the value set by the thermostat knob. When the indicator lamp goes out, it means that the heating is off and the cooking chamber has reached the set temperature.
Steam Humidity Lamp
This knob allows you to activate the humidification function for how long it remains pressed.
Attention: For the humidification function to work optimally, it is necessary that the temperature is set to at least 80-100 ºF. In addition, for a good cooking it is necessary to preheat the oven to the desired temperature before activating the steam injection.
Fan Speed Regulation
The oven has two different fan/motor speeds. Press the button and insert the desired one:
- It means that the motor is at full speed and is used in most cooking.
- It means that the motor is at minimum speed and is mainly used for delicate dishes such as pastry.

Multi Function Control Panel
- Grill
- Grill + Fan
- Convection
- Defrost
- Thermostat
- Temperature Regulation
- Thermostat
- Adjust Time
- Steam/Humidity Control System
Time Regulation
When the manual option is selected, the oven is always on for an infinite time until the operator intervenes. When a certain value is selected, the oven remains on for that amount of time (maximum 120 minutes).
Temperature Regulation
This knob allows you to select the desired cooking temperature.
Thermostat Warning Lamp
When the oven heating elements light up, they are switched on because the internal temperature of the cooking chamber is lower than the value set by the thermostat knob. When the indicator lamp goes out, it means that the heating is off and the cooking chamber has reached the set temperature.
Steam/ Humidity Lamp
This knob allows you to activate the humidification function for how long it remains pressed.
Cooking Selector Knob
It has 5 locations: Off, Defrost, Convection, Grill, Grill + Fan.
- I.1. When set to OFF, the oven shall be switched off for every aspect.
- I.2. When set to Defrost, the lights and fans work. The system Oven heater is always off
- I.3. When set to Convection, the lights, fans work. The furnace heating system is working and is controlled by the thermostat knob. Only the circular resistance around the fans while the grill resistor is always off.
- I.4. When the Grill is set, the oven heating system is working and is controlled by the thermostat knob. Only the grill while the circular resistance is always switched off
- I.5. When the Grill + fan is running the oven heating system is operating and is controlled by the thermostat knob. It works only the grill + fans while the circular resistance is always off.

Horizontal Digital Control Panel
- On/Off
- Indicator For Cooking Programmes
- Cooking Programmes
- Adjustment Time
- Temperature Regulation
- Thermostat
- Warning Lamp Degrees Celsius
- Indication Of Degrees Fahrenheit
- Value Increase Button
- Value Decrease Button
- Cooking Phase Indicator
- Button For Cooking Phases
- Indicator For Humidification
- Regulation Of Steam/Humidity
- Start/Stop
- Start/Stop Indicator Cooking
- Fan Adjustment
On/Off
When the oven voltage is supplied, the control panel lights up and the operating display shows the temperature of the chamber. The oven is now ready to start working
Start/Stop
This button is used to start/stop a previously set cooking program or cycle.
Temperature Regulation
When the oven is on, the temperature display displays the temperature inside the cooking chamber.
To set the desired temperature press the temperature adjustment button and then act on the I and J buttons. The temperature display will flash the set value. Press the temperature selector to confirm or wait 5 seconds and the new value will be stored; the temperature value inside the cooking chamber will appear on the display.
Values can be set from 30 ºC to 260 ºC.
During cooking, the CAMERA display displays the actual temperature inside the chamber, while to display the set temperature, press the temperature selector. The RESISTANCE F icon is on red when the heating is on and on green when it is off.
Time Regulation
To set the time press the time selector and then act on the I or J buttons. Press the time selector to confirm the set time.
The adjustable time range is 999 minutes.
Going below the minimum value of 1minutes you enter the “--” mode which means infinite time and the oven will continue to work with the parameters set until you press the START/STOP button. During this last phase the time display displays the time of use in minutes in order to determine how long it has been in operation. While if you set a time in the display there will be a countdown until the shutdown.
Steam/Humidity Regulation
It allows you to perform the humidification in manual cooking or to set various models of humidity during cooking with programs.
Humidification in cooking Manual: during cooking, the press of the HUMIDIFICATION B2 button generates steam in the cooking chamber for the duration of its pressure. The LED HUMIDIFICATION M will be lit. In case of reversal of rotation of the motor, the humidification will stop momentarily.
Automatic humidification during cooking with the program: after pressing the HUMIDIFICATION button, with the I or J buttons you can set the desired humidity value. The adjustable humidity range is: OFF - 20% - 40%
60% - 80% - 100%. When changing the values on the display will flash and pressing the HUMIDIFICATION button again will be stored or you have to wait 5 seconds.
During cooking the LED HUMIDIFICATION lights up when you are generating steam in the cooking chamber and instead flashes in moments of pause. In the case of furnaces with the reverse rotation system of the motor, the humidification will stop momentarily.
During cooking, pressing the HUMIDIFICATION button allows steam to be generated in the cooking chamber for the duration of its pressure.
Button Steps
In the cooking with program, 3 different cooking PHASES can be realized for each single program.
LED Phase of Cooking
The illuminated LED informs about which phase is operating at that time (1,2,3).
LED Resistances
The led of the resistors lights up when they are in operation.
LED Celcius / Fahrenheit
The LED on confirms which oven mode is operating (celsius or fahrenheit).
Manual Cooking
Press the ON/OFF button to activate the oven. After setting temperature, time, steam (see instructions above) the cooking cycle starts by pressing START/STOP. The oven automatically starts the
pre-heating and after the “beep” will be ready to load food. After entering the food and closing the door, the preset cooking starts automatically. The cooking cycle can be interrupted at any time by pressing START/STOP. During the cooking process you can change the temperature and time, the percentage of steam can not be changed during operation, you need to stop the oven and change manually.
Manual steam can be introduced at any time by pressing the steam button. During cooking time will display the count-down.
END flashes on the display at the end of a firing cycle, fan, Humidification and resistors turn off and the furnace emits a “beep” for 40 seconds.
Automatic Preheeating
This function is automatic on all cooking cycles (manual and programs) It consists in heating the oven to a temperature of 20% higher than the set one. This function is necessary to compensate for the heat loss that occurs when opening the door for the insertion of food.
When you start a program, the oven first performs this preheating cycle (“PRE” appears on the display), at the end of which a beep is emitted that ends only when the door is opened. The previously selected program automatically starts when the door is closed.
If you just want to stop the beep just press any button. The humidification system cannot be used during the preheating phase.
Cooking with Programs
The oven has 99 programmable recipes, each with 3 phases (1,2,3,).
To create a new cooking program press the COOKBOOK C button and “P01” will appear on the display, acting on I or J choose the desired program number. Press C to confirm.
Now the oven is positioned on the first phase (led lit on N. 1) and you can set the time, temperature and steam in the various stages as follows:
select the temperature button and with I / J set the desired value. Press the temperature button to confirm.
select the time button and with I/J set the desired value. Press the time button to confirm.
select the steam button and with I/J set the desired value. Press the steam button to confirm.
select the L cooking phase button to go to the second phase (in the case of the cooking process with several phases) and you will see the second LED on.
Now you can adjust time, temperature and steam as previously described and go to the “cooking phase” No. 3).
To save a program with 3 steps, after setting them, press the COOKBOOK button while holding down until the LED flashes. In case you only have 1 or 2 steps in the unused one enter “0” on the time and save.
- When the program is stored, you can press START/STOP to activate the cooking process.
- The oven will begin to preheat and after “beep” will be ready to load the food.
- END flashes on the display at the end of a firing cycle; fan, humidification and heating stop and beep for 40 seconds.
You are allowed to change the program data during cooking running to fit your needs. Changes made during cooking are only valid for cooking.
Press and hold the COOKING STEPS button and continue to the next step before the time runs out.
To delete a program just put the first phase in infinite time and save the program.
Manual Cooking Return
To return to the MANUAL cooking mode when exiting the program mode, the following procedure must be followed:
Press the ON/OFF button until MAN (manual) appears on the display.
Power Cut
In the event of a power failure during the cooking cycle, the oven changes to the OFF position.
Alerts
All alarms are accompanied by the buzzer sound. The buzzer can be silenced by pressing a button.
ERR = CAMERA PROBE ALARM:
It occurs in the event of a camera probe failure.

Digital Control Panel
- On/Off Button
- Menu Button
- Minus/Down Button
- Over/Over Button
- Time Button
- Temperature Button
- Control Button For Ventilation
- Humidity Button
- Phase/Cycle Button
- Start/Stop Button
- Rising Button
- Shortcut Programmes Button
Home Screen
The single press of the ON/OFF button, leads to activate the ON status of the card. If the card is already in the ON state, pressing the ON/OFF button for a long time will bring you to the standby state.
If the card remains in the ON state for a parameter-defined downtime, it automatically returns to the standby state.
The home page shows the default manual cooking screen. At the bottom of the display, there are some status icons and in the central field is always shown the actual temperature of the room when we are not cooking, while when we are cooking we have the current time.
The managed status icons are:
- Symbol indicating active heating (heating elements on).
- WiFi presence signal.
- Warning triangle
- Humidification symbol
- Symbol for light room.
- Pause sign/ play, to indicate the state of cooking when you open or close the door.
Wizard to Show a Cooking Manual
By pressing the ON/OFF button, the oven switches to ON status and loads a manual cooking program with default values.
All programs including the manual one have the automatic preheating function in which set-point is equal to the set of the first phase increased by 20%.
Up to 100 programs with up to four phases each can be stored in the card and the following cooking settings are provided to be adjusted for each phase:
- Temperature set
- Time set
- Dampness
- Fan speed
Regulation of Steam and Humidity
During the start phase, the prolonged pressure of the steam button opens the water solenoid valve for the duration of the button press, if instead a single press on the humidity button shows the set value and allows the change.
Fan Speed
The furnace has two different fan/motor speeds:
- 2=Max: Without pressing any button, the motor is at full speed and is used in most of the firing; the starting speed of the fan is always placed in “Max”.
- 1=Min: By pressing the fan/motor speed button, the motor reaches the minimum speed, which is mainly used for delicate dishes, such as pastry.
To adjust the fan speed:
During preheating, it is NOT possible to change the fan speed.

Multi Step Recipe Creation
Each program, including the manual program, may consist of:
- A pre-set preheating phase and up to 3 cooking phases.
- A fixed preheating cycle and up to 4 cooking steps.
To create a recipe with multiple steps:
- Access the manual cooking screen and set the parameters of the first phase.
- Press the FASI button to enter the second phase or press the START/STOP button to start cooking.
- Set the desired parameters for the second stage.
- Press the PHASES button to enter the third stage or press the STAR/STOP button to start cooking.
- Set the desired parameters for the third stage or press the STAR/STOP button to start cooking.
- Press the PHASES button to enter the fourth step.
- Set the desired parameters for the fourth stage.
- Press the STAR STOP button to start cooking.
- To cancel a phase it is necessary to bring the set-time of the phase to the value zero.
Attention
- You cannot set 0 time for the first step.
- If in any phase the set time is infinite, it will not be possible to set a time for the subsequent phases.
- It is not possible to set infinite time on a phase, if one of the following phases is enabled;
- It is not possible to delete a phase if the next one is an active phase vice versa it is possible to disable from time to time only the last active phase);
- During a cooking cycle it is possible to force the transition to the next phase before the time of the current phase expires, setting the cooking time of the current phase to zero.
Pre Heating Phase
Each program, including the manual cycle, can have its own preheating phase.
To enable the preheating phase, by pressing the PHASES button, select the preheating phase (P), pressing the TEMPO key you can enable or disable the preheating phase.
There are several modes of operation of the preheating phase that the user can select by changing the parameter P20 (See paragraph “Access to parameters”):
- P20 = 0 Preheating disabled
- P20 = 1 The temperature of the preheat is equal to the temperature of phase 1 increased by 20%, you can disable the preheat.
- P20 = 2 The temperature of the preheat is set equal to the temperature of phase 1 increased by 20 ºC (68 ºF), you can disable the preheating.
- P20 = 3 The user manually sets the value of the preheating temperature.
- P20 = 4 The temperature of the preheat is equal to the temperature of phase 1 increased by 20%, it is not possible to change or deactivate the preheating phase.
To disable or change the preheating:
- Select the desired program or access a manual cooking.
- Select the “P” phase by pressing the FASI button.
- If the value of P20 is set to 1 or 2, you can only deactivate it by pressing the TEMPO button.
- If P20 is set to 3, however, you can adjust the fan temperature and speed.
- Press the PHASES button to return to the first stage of cooking.
When the preheating temperature is reached, the buzzer is activated and the light flashes. The preheating temperature is maintained in the cooking chamber until the door is opened. When the oven door is closed, the first phase of the cooking cycle is automatically started.The buzzer that signals the preheating temperature is silenced when the door is opened or when any button is pressed.If during the preheating phase, and Before the preheating temperature is reached, the oven door is opened, the preheating phase is interrupted.
Menu List
Repeatedly pressing the MENU button (when no cooking cycle is in progress) scrolls through the menu list:
- Menu last used programs
- Recipe list menu
- Special cycle menu
- Menu service
By holding down the MENU button (when a cooking cycle is not in progress) in a new program or a recipe already saved, you access the recipe editing menu.
Menu for Final Programmes
In this menu you can see the last 10 cooking programs used. In this menu you can access the cookbook.
Recipe Menu List
The recipe book is divided into five categories; within them you can save up to a maximum of 100.
Each program can be saved in up to four steps.
The use of the programs allows to standardize the cooking processes and always guarantee the same quality of result.
To start a program from the cookbook:
At this point control starts an infinite time cycle with parameters corresponding to those set.
To activate the individual timers:
- Select the desired timer by pressing the PLUS and MINUS buttons.
- The timer in selected changes color and the relative text is highlighted in red.
- Activate the selected timer change by pressing the TIME button and set the desired value by pressing the PLUS and MINUS buttons.
- Confirm the value setting by pressing the TIME button.
- The timer will start counting once the appliance door is opened and closed.
- If two or more timers are set before the door is opened, they are all started at the same time when the door is opened and closed.
- At the bottom of the screen, during the cycle, there will be status icons and in the central area the temperature of the cooking chamber is shown.
- To stop the cycle, press the START STOP button.
In this menu you can access the following machine functions:
- Parameters
- USB function
- Wi Fi connection - webserver / Connection info
- Machine information
- Tongue
- Date and time
- Delete images from programs

Access to Parameters
To access the parameter setting menu:
- Enter the password with the PLUS and MINUS keys

(user password is: 30)
Confirm with the MENÙ button
- If the password entered is incorrect, the control is placed on the main menu.
- By pressing the PLUS and MINUS buttons, you can scroll through the list of parameters.
- Select the Tongue to change.
- Set the value of the parameter within set limits by pressing the PLUS and MINUS buttons
- Confirm with the MENÙ button.
Exit the parameter menu by pressing the ON/OFF button, alternatively the output from the menu is automatically after 2 minutes of inactivity.
All the parameters that can be modified are listed below:
| Parameter | Description | Value | Limits | Units of Measure |
|---|---|---|---|---|
| P01 | Unit of measurement temperature - 0=°C - 1=°F | 0 | 0-1 | Number |
| P06 | Default setpoint cooking | 150 | 30-260 | °C |
| P09 | Default Set Point Cooling | 50 | 30 ÷ 70 | °C |
| P11 | Time Max Phase | 240 | 60 ÷ 599 | Minutes |
| P12 | Default cooking time extension | 1 | 1 ÷ 999 | Minutes |
| P13 | Delay to prolong the cooking | 120 | 1 ÷ 600 | Seconds |
| P20 | Preheating mode
0= disabled + 3 cooking steps 1= delta % from temp. phase 1 + 3 stages cooking 2= delta C from temp. stage 1 + 3 stages cooking 3= manual temp set. + 3 cooking steps 4= preheating at fixed % + 4 cooking steps |
4 | 0 ÷ 4 | Number |
| P21 | Delta preheating in manual mode | 25 | 0 ÷ 100 | % / °C |
| P24 | Editable percentage P20=4 | 25 | 0 ÷ 100 | % |
| P25 | Active preheating in manual program | 1 | 0 ÷ 1 | Flag |
| P120 | Oven lights mode on: 0=timed on key press, 1=always on while cooking, 2= always on in ON | 1 | 0 ÷ 2 | Flag |
| P121 | Lights activation time (for P120=0) | 45 | 0 ÷ 120 | Seconds |
| P138 | Default heart probe temperature | 50 | 0 ÷ 110 | °C |
| P140 | Buzzer sound (0=always plays) | 0 | 0 ÷ 999 | Seconds |
| P204 | Oven downtime for automatic stand-by switching | 10 | 0 ÷ 60 | Minutes |
| P220 | Program number associated with key P1 - 0 = no associated program | 0 | 0 ÷100 | Number |
| P332 | Set camera Multi-timer | 0 | 0 ÷100 | °C |
| P333 | Set humidity Multi-timer | 0 | 0 ÷100 | % |
| P351 | Set temperature in rising | 30 | 20 ÷ 60 | °C |
| P352 | Set time in rising | 60 | 1 ÷ 599 | Minutes |
| P380 | Pin set for delta T program | 50 | 30 ÷ 260 | °C |
| P381 | Delta T set of the room | 30 | 20 ÷ 60 | °C |
| P382 | Humidity set for delta T program | 0 | 0 ÷ 100 | % |
| P400 | Enabling washing | 0 | 0 ÷ | Number |
| P500 | Log time for HACCP - 0 = HACCP log disabled | 5 | 0 ÷ 10 | Minutes |
| P501 | Delta temperature for Log HACCP (*) | 5 | 0 ÷ 30 | °C |
USB Functions
The USB menu allows the following operations:
- Update firmware (only appears if compatible file is detected).
- Update languages (only appears if compatible file is detected).
- Export HACCP.
- Export recipes.
- Import recipes (only appears if compatible file is detected).
- Import parameters (only appears if compatible file is detected).
- Import images (only appears if.jpg file is detected in the appropriate sub- folder).
- Import recipes + pictures:
- Full update (only appears if a compatible file group is detected).
If you try to access this menu without USB, a message appears that warns of the lack of the stick.

Firmware Update From USB
To start an update:
- Upload the update files to a USB stick. Use only and exclusively released by the manufacturer.
- Select the service menu by repeatedly pressing the MENU button
- Select the item “USB” acting on the keys PLUS and MINUS
- Confirm with the MENÙ button
Upon confirmation, the first phase of the firmware update starts and may take a few minutes. At the end of the first phase of update, pressing the START STOP button starts the second and last phase of update that can take a few minutes. At the end of the process, the control is switched to stand-by mode


Update Languages From USB
To start an update:
- Select the service menu by repeatedly pressing the MENU button
- Select the item “USB” acting on the keys PLUS and MINUS
- Select the item “Update languages” acting on the buttons PLUS and MINUS
- Confirm with the MENÙ button
- Upon confirmation, the update starts and can last a few minutes.
- At the end you send a notification message
- Press the ON/OFF button several times to return to home
ATTENTION!
The language update procedure irreversibly deletes the previously present database and may take a few minutes.
HAACP Export To USB
To export the HACCP log:
- Select the service menu by repeatedly pressing the MENU button
- Select the item “USB” acting on the keys PLUS and MINUS
- Select the item “Export HACCP” acting on the keys PLUS and MINUS
- Confirm with the MENÙ button
- Confirm with the MENU button again to start the process
- A notification message appears at the end of the process.
- Press the ON/OFF button repeatedly to return to the homepage
The HACCP export procedure allows you to save the operating data stored in the control on the USB stick.
A file is exported for each day of use with a name of type yy_mm_dd and extension “.csv”.

Each log file is accompanied by a file with identical name, but extension.” md5”, which allows the integrity verification.
The exported operation data identifies a possible set of events:
- The start event.
- The event of phase change.
- The event stops or at the end of the cooking cycle.
- Possible alarm conditions.
- One recording every 5 minutes of:
- Temperature.
- Set point.
- Missing time at end of phase.
- Duration of the phase.
- One recording every five degrees of temperature change in the room.

Export Recipes To USB

To export all recipes:
- Insert the USB stick with UTRIC file*. cvs:
- Select the service menu by repeatedly pressing the MENU button.
- Select the "Parameters" acting on the keys PLUS and LESS (User password is: 30).
- Return to the service menu and select “USB then “Export recipe”.
- Confirm with the MENÙ button.
- Confirm with the MENÙ button again to start the process.
- At the end of the process, an end-of-process pop-up appears. Press the ON/OFF button repeatedly to return to the homepage


Import Recipes From USB
To import all recipes:
- Insert the USB stick with UTRIC file*. cvs:
- Select the service menu by repeatedly pressing the MENU button
- Select the item "Parameters" acting on the keys PLUS and LESS (User password is: 30)
- Return to the service menu and select “USB then “Import recipe”
- Confirm with the MENÙ button
- Confirm with the MENU button again to start the process
Import Parameters From USB

ATTENTION!
Incorrect import of parameters can lead to irreversible malfunction of the equipment

To import the parameters:
- Upload the update files to a USB stick. Use only and exclusively released by the manufacturer.
- Select the service menu by repeatedly pressing the MENU button
- Select the item “USB” acting on the keys PLUS and MINUS
- Select the item “Import parameters” acting on the keys PLUS and MINUS
- Confirm with the MENÙ button
- Upon confirmation you start updating the database which may take a few minutes.
- A notification message appears at the end of the process.
- Press the ON/OFF button several times to return to home

ATTENTION!
With this operation, all previously uploaded images are irreversibly removed from the database control memory.
Import Recipes + Images From USB

With this feature you can import recipes and associated images via a single procedure.
To import recipes and associated images:
- Insert into a USB stick containing:
- A single folder named “jpg” containing all the images to import.
- The recipe file properly prepared.
- Select the service menu by repeatedly pressing the MENU button
- Select the item “USB” acting on the keys PLUS and MINUS
- Select the item “Import recipes + images” acting on the buttons PLUS and MINUS
- Confirm with the MENÙ button
- Upon confirmation you start updating the database which may take a few minutes

- A notification message appears at the end of the process.
- Press the ON/OFF button several times to return to home
Full Firmware Update From USB

To start an update:
- Upload the update files to a USB stick. Use only and exclusively released by the manufacturer.
- Select the service menu by repeatedly pressing the MENU button
- Select the item “USB” acting on the keys PLUS and MINUS
- Select the item “Massive Update” acting on the keys PLUS and MINUS
- Confirm with the MENÙ button
- The confirmation of the process starts the first phase of the firmware update which may take a few minutes
- At the end of the first phase of update, pressing the START STOP button starts the second and last phase of update that can take a few minutes.
- At the end of the process, the control is switched to stand-by method
ATTENTION!
This procedure updates all the scan operation files simultaneously. If there are not all the necessary files inside the USB key, the function is not available on the selection menu.
Direct Connection To Smartphone
You can create a direct connection between your smartphone and the equipment. The direct connection allows to access locally (within about 6 meters from the device) to the cookbook via smartphone and/ or to perform the necessary operations to connect to a Wi-Fi network.

To connect the equipment directly to a Smartphone:
- Turn on the appliance.
- Press the ON/OFF button to return to home
- Scan the FIRST qrcode “Connect” that is displayed on the screen using a Smartphone with Internet connection.
- Accept the network connection on the Smartphone screen.

- Wait for the connection between the Smartphone and the equipment to be established.
- Press the MINUS button for connection and the SECOND QR Code
- Scan the SECOND qrcode that appears on the screen using the previously used Smartphone.
- Confirm access to the proposed website on the Smartphone screen.
- The Smartphone displays a screen that allows you to access the device’s cookbook then press the button “Go to the cookbook”
- The structure of the recipe book where you can navigate to view, create, edit, save, associate images or delete recipes is displayed on your smartphone.
- Press ON/OFF to disconnect the Smartphone
Connection To WI-FI Network And Cloud Server
To connect your equipment to the Cloud Server:
- Press the ON/OFF button to return to home
- Scan the FIRST qrcode “Connect” that is displayed on the screen using a Smartphone with Internet connection.
- Accept the network connection on the Smartphone screen.
- Wait for the connection between the Smartphone and the equipment to be established.
- Press the MINUS button for connection and the SECOND QR Code
- Scan the SECOND qr code that appears on the screen using the previously used Smartphone.
- Confirm access to the proposed website on the Smartphone screen.
- A screen is displayed on the Smartphone screen that allows you to connect the equipment to a Wi-Fi network. then press the button “Connect oven”.
- Select one of the proposed available networks you want to access (if no networks are made available automatically press the button “Scan networks”). Enter the Wi-Fi network password and press the “Connect” button.
- Wait until the green field with “Online” appears. Disconnect from the device via the smartphone’s Wi-Fi connection management menu.
- Press MINUS four times until the “Chefcloudconnect” QR code appears on the screen.
- Scan the QR code that appears on the screen using your Smartphone.
- Press the “Copy Text” button displayed on your Smartphone.
- Open a Browser page and paste the text.
- Follow the instructions on the web page to configure the CLOUD connection
ATTENTION!
For more information request the dedicated user manual
Machine Information

To access the device information:
- Select the service menu by repeatedly pressing the MENU button
- Select the item “Info” acting on the buttons PLUS and MINUS
- Confirm with the MENÙ button
- The following information is displayed on the screen:
- The firmware version
- The release date of the firmware
- The serial or serial number.
- Press the ON/OFF button several times to return to home

Language Settings

To change the device language:
- Select the service menu by repeatedly pressing the MENU button
- Select the item “Language” acting on the keys PLUS and MINUS
- Confirm with the MENÙ button
- Select the nationality of the desired language
- Confirm with the MENÙ button
- Press the ON/OFF button several times to return to home
Setting Up Date And Time

To change the date and time of your device:
- Select the service menu by repeatedly pressing the MENU button
- Select the desired item by pressing the PLUS and MINUS buttons
- Confirm with the MENÙ button
- Confirm with the MENÙ button
- Press the ON/OFF button several times to return to home
ATTENTION!
If the equipment is connected to a Wi-Fi network, the date and time setting section will not be available. The necessary information is automatically set via the network.
Image Deletion


To delete images from the library:
- Select the service menu by repeatedly pressing the MENU button
- Select “Delete images” by pressing the PLUS and MINUS keys
- Confirm with the MENÙ button
- Select the image to be deleted using the PLUS and MINUS buttons
- Confirm with the MENÙ button
- Press the ON/OFF button several times to return to home
Menu Change Recipe
By means of this menu it is possible:
- Save - Save a new recipe
- Copy - Copy a recipe
- Rename - Rename a recipe
- Cancel - Delete a recipe permanently
- Associate - Associate a recipe to an image
- Disassociate - Dissociating a recipe to an image
- Quick Edit - Change a recipe by means of direct connection to Smartphone
- Delayed Start - Set a Delayed Start Recipe

Save A Recipe
To save a new recipe or save changes made to a recipe:
- Press and hold the menu button
- Select "Save" button by pressing PLUS and MINUS buttons.
- Confirm with START/STOP button

Set the recipe name to a maximum of 20 characters:
- You can scroll through the letters by acting on the buttons PLUS and LESS
- Confirm the selected letter and proceed to the next one by pressing the MENU button
- Enter any spaces between letters by pressing the TIME button
- Delete letters by pressing the TEMPERATURE button
- Then select the category acting on the keys PLUS and LESS
- Confirm with the MENÙ button
- Press the ON/OFF button several times to return to the home and view the recipe
- To exit the saved recipe, go back to Recipe List and select Manual.

Copy A Recipe
To copy a recipe:
- Press and hold the menu button on the saved recipe
- Select “Copy” by pressing the PLUS and MINUS buttons
- Confirm with START/STOP button

Set the recipe name to a maximum of 20 characters:
- You can scroll through the letters by acting on the buttons PLUS and LESS
- Confirm the selected letter and proceed to the next one by pressing the MENU button
- Then select the category acting on the keys PLUS and LESS
- Confirm with the MENÙ button
- Press the ON/OFF button several times to return to the home and view the recipe
Delete A Recipe

To delete an existing program:
- Press and hold the menu button on the saved recipe
- Select “Delete” by pressing the PLUS and MINUS buttons
- Confirm with the MENU button
Linking A Recipe To An Image

To associate an image to a program:
- Press and hold the menu button on the saved recipe
- Select “Associate” by pressing the PLUS and MINUS buttons
- Confirm with START/STOP button
- Select then the image to be associated by acting on the buttons PLUS and LESS
- Confirm with the MENU button
In case the USB stick is present with images inserted in the appropriate folder, after the last image in the local archive you start scrolling through the list of images on the USB memory. Selecting an image on the USB stick, it is imported into the equipment database.
Disassociate A Recipe To An Image

To disassociate an image from a program:
- Press and hold the menu button on the saved recipe
- Select "Disassociate" by pressing the PLUS and MINUS buttons
- Confirm with START/STOP button


Quick Recipe Change (Web Server)
The function of fast editing allows to modify a recipe by means of a direct connection with Smartphone.
- Press the ON/OFF button from the oven and scan the first “Connect” QR code displayed on the screen using a Smartphone.
- Accept the network connection on the Smartphone screen.
- When the connection is established, scan the second QR code by pressing the MINUS key 2 times, using the previously used Smartphone, and confirm access to the proposed website.
- A screen is displayed on the Smartphone that allows you to access the device’s cookbook, then press the “Go to the cookbook” button.
- By pressing “Go to the cookbook” you can access the oven cookbook, select the desired category and create or modify an existing recipe and then set the parameters, save, associate images or delete the recipe itself with your Smartphone.
ATTENTION!
To use this mode the display must always remain in this screen. If you press ON/OFF and return to the homepage you will lose your internet connection.
Set Up A Recipe With Delayed Start

To start a recipe with delayed start:
- Press and hold the menu button on the saved recipe
- Select the entry "Late departure" acting on the buttons PLUS and MINUS
- Confirm with the MENU Button
Select the start period by pressing the PLUS and MINUS keys from the possible values:
- Today
- +24h
- +48h
Confirm with the MENÙ button
Set the desired start time
ATTENTION: 24h format [hh]:[mm]
Then approve with the MENU button
ATTENTION!
Setting a delayed startup program does not allow other loops to run. To cancel a delayed start setting, simply press the ON OFF button.
Selection Of A Recipe With Favorite Keys

You can quickly select a recipe by pressing one of your favorite P1-P6 keys (only if no other loops are running). The corresponding recipe is displayed and ready to start. Pressing one of the hotkeys to which no recipe has been associated will cause an acoustic error signal. No recipe is selected.
Prolonged pressing of one of the favorite buttons P1-P6 allows you to view the image associated with the corresponding recipe.

To associate a program to one of your favorite keys:
- Access the menu “Recipe list”:
- Select the desired recipe with the PLUS and MINUS buttons
- Press the favorites button that you intend to associate with the recipe.
- You will then see a message with the confirmation request.
- Then confirm with the MENU button
Temporary Modification Of A Recipe
You can temporarily change the settings of a recipe both before and during execution. These changes are temporary and are not stored in the equipment memory.
Starting, Pausing Or Interrupting A Recipe
To start a selected recipe, simply press the START/STOP button.
Opening the started prescription port temporarily stops the loop, which resumes when the door is closed again. The pause symbol is displayed at the bottom of the screen to continue the cycle break.
The definitive stop of the recipe takes place at the end of the set time of the last cooking phase or by pressing the START/STOP button. At the end of the recipe, a notification message is displayed on the screen and an acoustic signal is issued.
The acoustic signal remains active until the door is opened or when any key is pressed.